A team admin can create and manage automations for the team’s projects, as well as components of their automations, such as webhooks, secrets, and Slack integrations. Refer to Team settings.
To create a registry automation, you must have access to the registry. Refer to Configure Registry access.
To create a Slack automation, you must have permission to post to the Slack instance and channel you select.
Create an automation
Create an automation from the project or registry’s Automations tab. At a high level, to create an automation, follow these steps:
If necessary, create a W&B secret for each sensitive string required by the automation, such as an access token, password, or SSH key. Secrets are defined in your Team Settings. Secrets are most commonly used in webhook automations.
Configure the webhook or Slack integration to authorize W&B to post to Slack or run the webhook on your behalf. A single webhook or Slack integration can be used by multiple automations. These actions are defined in your Team Settings.
In the project or registry, create the automation, which specifies the event to watch for and the action to take (such as posting to Slack or running a webhook). When you create a webhook automation, you configure the payload it sends.
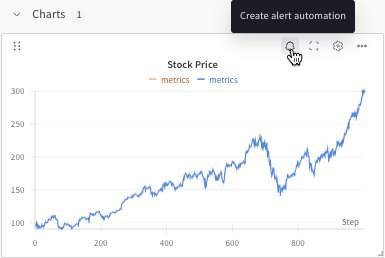
Or, from a line plot in the workspace, you can quickly create a run metric automation for the metric it shows:
Hover over the panel, then click the bell icon at the top of the panel.
Configure the automation using the basic or advanced configuration controls. For example, apply a run filter to limit the scope of the automation, or configure an absolute threshold.
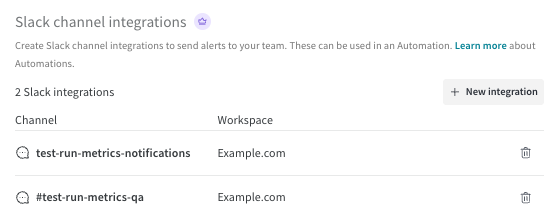
A team admin can add a Slack integration to the team.
Log in to W&B and go to Team Settings.
In the Slack channel integrations section, click Connect Slack to add a new Slack instance. To add a channel for an existing Slack instance, click New integration.
If necessary, sign in to Slack in your browser. When prompted, grant W&B permission to post to the Slack channel you select. Read the page, then click Search for a channel and begin typing the channel name. Select the channel from the list, then click Allow.
In Slack, go to the channel you selected. If you see a post like [Your Slack handle] added an integration to this channel: Weights & Biases, the integration is configured correctly.
Now you can create an automation that notifies the Slack channel you configured.
For programmatic automation creation: Slack integrations must be configured through the UI due to OAuth requirements. However, once configured, you can use the API to create multiple automations that use the same Slack integration. This separation allows secure channel authorization while enabling flexible automation management via code.
View and manage Slack integrations
A team admin can view and manage the team’s Slack instances and channels.
Log in to W&B and go to Team Settings.
View each Slack destination in the Slack channel integrations section.
Delete a destination by clicking its trash icon.
Create an automation
After you add a Slack integration, select Registry or Project, then follow these steps to create an automation that notifies the Slack channel.
A Registry admin can create automations in that registry.
Log in to W&B.
Click the name of a registry to view its details,
To create an automation scoped to the registry, click the Automations tab, then click Create automation. An automation that is scoped to a registry is automatically applied to all of its collections (including those created in the future).
To create an automation scoped only to a specific collection in the registry, click the collection’s action ... menu, then click Create automation. Alternatively, while viewing a collection, create an automation for it using the Create automation button in the Automations section of the collection’s details page.
Fill in any additional fields that appear, which depend upon the event. For example, if you select An artifact alias is added, you must specify the Alias regex.
Set Action type to Slack notification. Select the Slack channel, then click Next step.
Provide a name for the automation. Optionally, provide a description.
Click Create automation.
A W&B admin can create automations in a project.
Log in to W&B.
Go the project page and click the Automations tab, then click Create automation.
Or, from a line plot in the workspace, you can quickly create a run metric automation for the metric it shows. Hover over the panel, then click the bell icon at the top of the panel.
Fill in any additional fields that appear, which depend upon the event. For example, if you select An artifact alias is added, you must specify the Alias regex.
Set Action type to Slack notification. Select the Slack channel, then click Next step.
Provide a name for the automation. Optionally, provide a description.
Click Create automation.
Create automations programmatically
You can also create Slack automations using the W&B API. This enables you to automate the creation and management of automations as part of your MLOps workflows.
Note: Slack integrations must be created through the W&B UI due to the OAuth authentication flow required by Slack. Once configured, you can use the API to list available integrations and create automations that use them.
Checking for Slack Integrations
Before creating automations, verify that you have Slack integrations configured:
import wandb
# Initialize the APIapi = wandb.Api()
# List all Slack integrations for your teamslack_integrations = list(api.slack_integrations(entity="your-team"))
ifnot slack_integrations:
print("❌ No Slack integrations found!")
print("Please configure a Slack integration in your team settings:")
print(f"https://wandb.ai/{your-team}/settings/integrations")
else:
print(f"✅ Found {len(slack_integrations)} Slack integration(s):")
for integration in slack_integrations:
print(f" - Channel: {integration.channel_name}")
print(f" ID: {integration.id}")
print(f" Team: {integration.slack_team_name}")
Helper Function for Integration Selection
defget_slack_integration(entity, channel_pattern=None):
"""Get a Slack integration, optionally filtered by channel name pattern""" integrations = list(api.slack_integrations(entity=entity))
ifnot integrations:
raiseValueError(f"No Slack integrations found for {entity}. ""Please configure one in team settings.")
if channel_pattern:
# Filter by channel name pattern matching = [i for i in integrations if channel_pattern in i.channel_name]
if matching:
return matching[0]
# Return first integration if no pattern or no matchesreturn integrations[0]
# Example usagetry:
# Get integration for alerts channel alerts_integration = get_slack_integration("my-team", "alerts")
print(f"Using Slack channel: {alerts_integration.channel_name}")
exceptValueErroras e:
print(e)
Example: Registry automation for artifact events
Create an automation that sends a Slack notification when a new model version is added to a registry collection:
import wandb
from wandb.automations import OnAddArtifactAlias, SendNotification
# Initialize the W&B APIapi = wandb.Api()
# Get the registry and collectionregistry = api.registry("my-registry", entity="my-team")
collection = registry.collection("my-model-collection")
# Get the Slack integrationslack_integration = next(api.slack_integrations(entity="my-team"))
# Define the event: Trigger when "production" alias is addedevent = OnAddArtifactAlias(
scope=collection,
filter={"alias": "production"}
)
# Define the action: Send notification to Slackaction = SendNotification.from_integration(
slack_integration,
title="Production Model Updated",
text="A new model version has been promoted to production.",
level="INFO")
# Create the automationautomation = api.create_automation(
event >> action,
name="production-model-alert",
description="Notify team when a model is promoted to production")
print(f"Created automation: {automation.name}")
Example: Monitor multiple collections
Create an automation that monitors all collections in a registry:
import wandb
from wandb.automations import OnCreateArtifact, SendNotification
# Initialize the W&B APIapi = wandb.Api()
# Get the registryregistry = api.registry("my-registry", entity="my-team")
# Get the Slack integration slack_integration = next(api.slack_integrations(entity="my-team"))
# Define event at registry scope (applies to all collections)event = OnCreateArtifact(
scope=registry,
filter={"artifact_type": "model"}
)
# Define the actionaction = SendNotification.from_integration(
slack_integration,
title="New Model Registered",
text="A new model artifact has been added to the registry.")
# Create the automationautomation = api.create_automation(
event >> action,
name="registry-wide-model-monitor",
description="Monitor all model artifacts across the registry")
Example: Project automation for run metrics
Create an automation that alerts when model accuracy drops below a threshold:
import wandb
from wandb.automations import OnRunMetric, RunEvent, SendNotification
# Initialize the W&B APIapi = wandb.Api()
# Get the projectproject = api.project("my-ml-project", entity="my-team")
# Get the Slack integrationslack_integration = next(api.slack_integrations(entity="my-team"))
# Define the event: Trigger when accuracy drops below 0.85event = OnRunMetric(
scope=project,
filter=RunEvent.metric("accuracy") <0.85)
# Define the action: Send alert to Slackaction = SendNotification.from_integration(
slack_integration,
title="⚠️ Low Accuracy Alert",
text="Model accuracy has dropped below 85%",
level="WARN")
# Create the automationautomation = api.create_automation(
event >> action,
name="low-accuracy-alert",
description="Alert when model accuracy drops below threshold")
print(f"Created automation: {automation.name}")
Example: Monitor training completion
Create an automation that notifies when long-running experiments complete:
import wandb
from wandb.automations import OnRunStateChange, RunState, SendNotification
# Initialize the W&B APIapi = wandb.Api()
# Get the projectproject = api.project("long-running-experiments", entity="my-team")
# Get the Slack integrationslack_integration = next(api.slack_integrations(entity="my-team"))
# Define the event: Trigger when a run finishesevent = OnRunStateChange(
scope=project,
to_state=RunState.finished
)
# Define the actionaction = SendNotification.from_integration(
slack_integration,
title="✅ Training Complete",
text="Your experiment has finished running.",
level="INFO")
# Create the automationautomation = api.create_automation(
event >> action,
name="training-completion-notifier",
description="Notify when training runs complete")
Managing automations via API
You can also list, update, and delete automations programmatically:
# List all automations for a projectautomations = project.automations()
for automation in automations:
print(f"- {automation.name}: {automation.description}")
# Update an automation (enable/disable)automation.enabled =Falseautomation.save()
# Delete an automationautomation.delete()
Advanced patterns
Using multiple filters
Combine multiple conditions in your automation triggers:
from wandb.automations import OnRunMetric, RunEvent, SendNotification
# Trigger when accuracy is high AND loss is lowevent = OnRunMetric(
scope=project,
filter=(RunEvent.metric("accuracy") >0.95) & (RunEvent.metric("loss") <0.1)
)
Dynamic Slack channel selection
Route notifications to different channels based on your team structure:
# Find specific Slack integration by channel nameslack_integrations = api.slack_integrations(entity="my-team")
dev_channel = next(
(ig for ig in slack_integrations if ig.channel_name =="ml-dev-alerts"),
None)
if dev_channel:
action = SendNotification.from_integration(dev_channel)
View and manage automations
Manage the registry’s automations from the registry’s Automations tab.
Mamage a collection’s automations from the Automations section of the collection’s details page.
From either of these pages, a Registry admin can manage existing automations:
To view an automation’s details, click its name.
To edit an automation, click its action ... menu, then click Edit automation.
To delete an automation, click its action ... menu, then click Delete automation. Confirmation is required.
A W&B admin can view and manage a project’s automations from the project’s Automations tab.
To view an automation’s details, click its name.
To edit an automation, click its action ... menu, then click Edit automation.
To delete an automation, click its action ... menu, then click Delete automation. Confirmation is required.
At a high level, to create a webhook automation, you take these steps:
If necessary, create a W&B secret for each sensitive string required by the automation, such as an access token, password, or SSH key. Secrets are defined in your Team Settings.
Create a webhook to define the endpoint and authorization details and grant the integration access to any secrets it needs.
Create the automation to define the event to watch for and the payload W&B will send. Grant the automation access to any secrets it needs for the payload.
Create a webhook
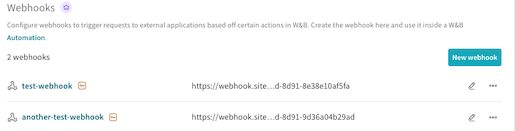
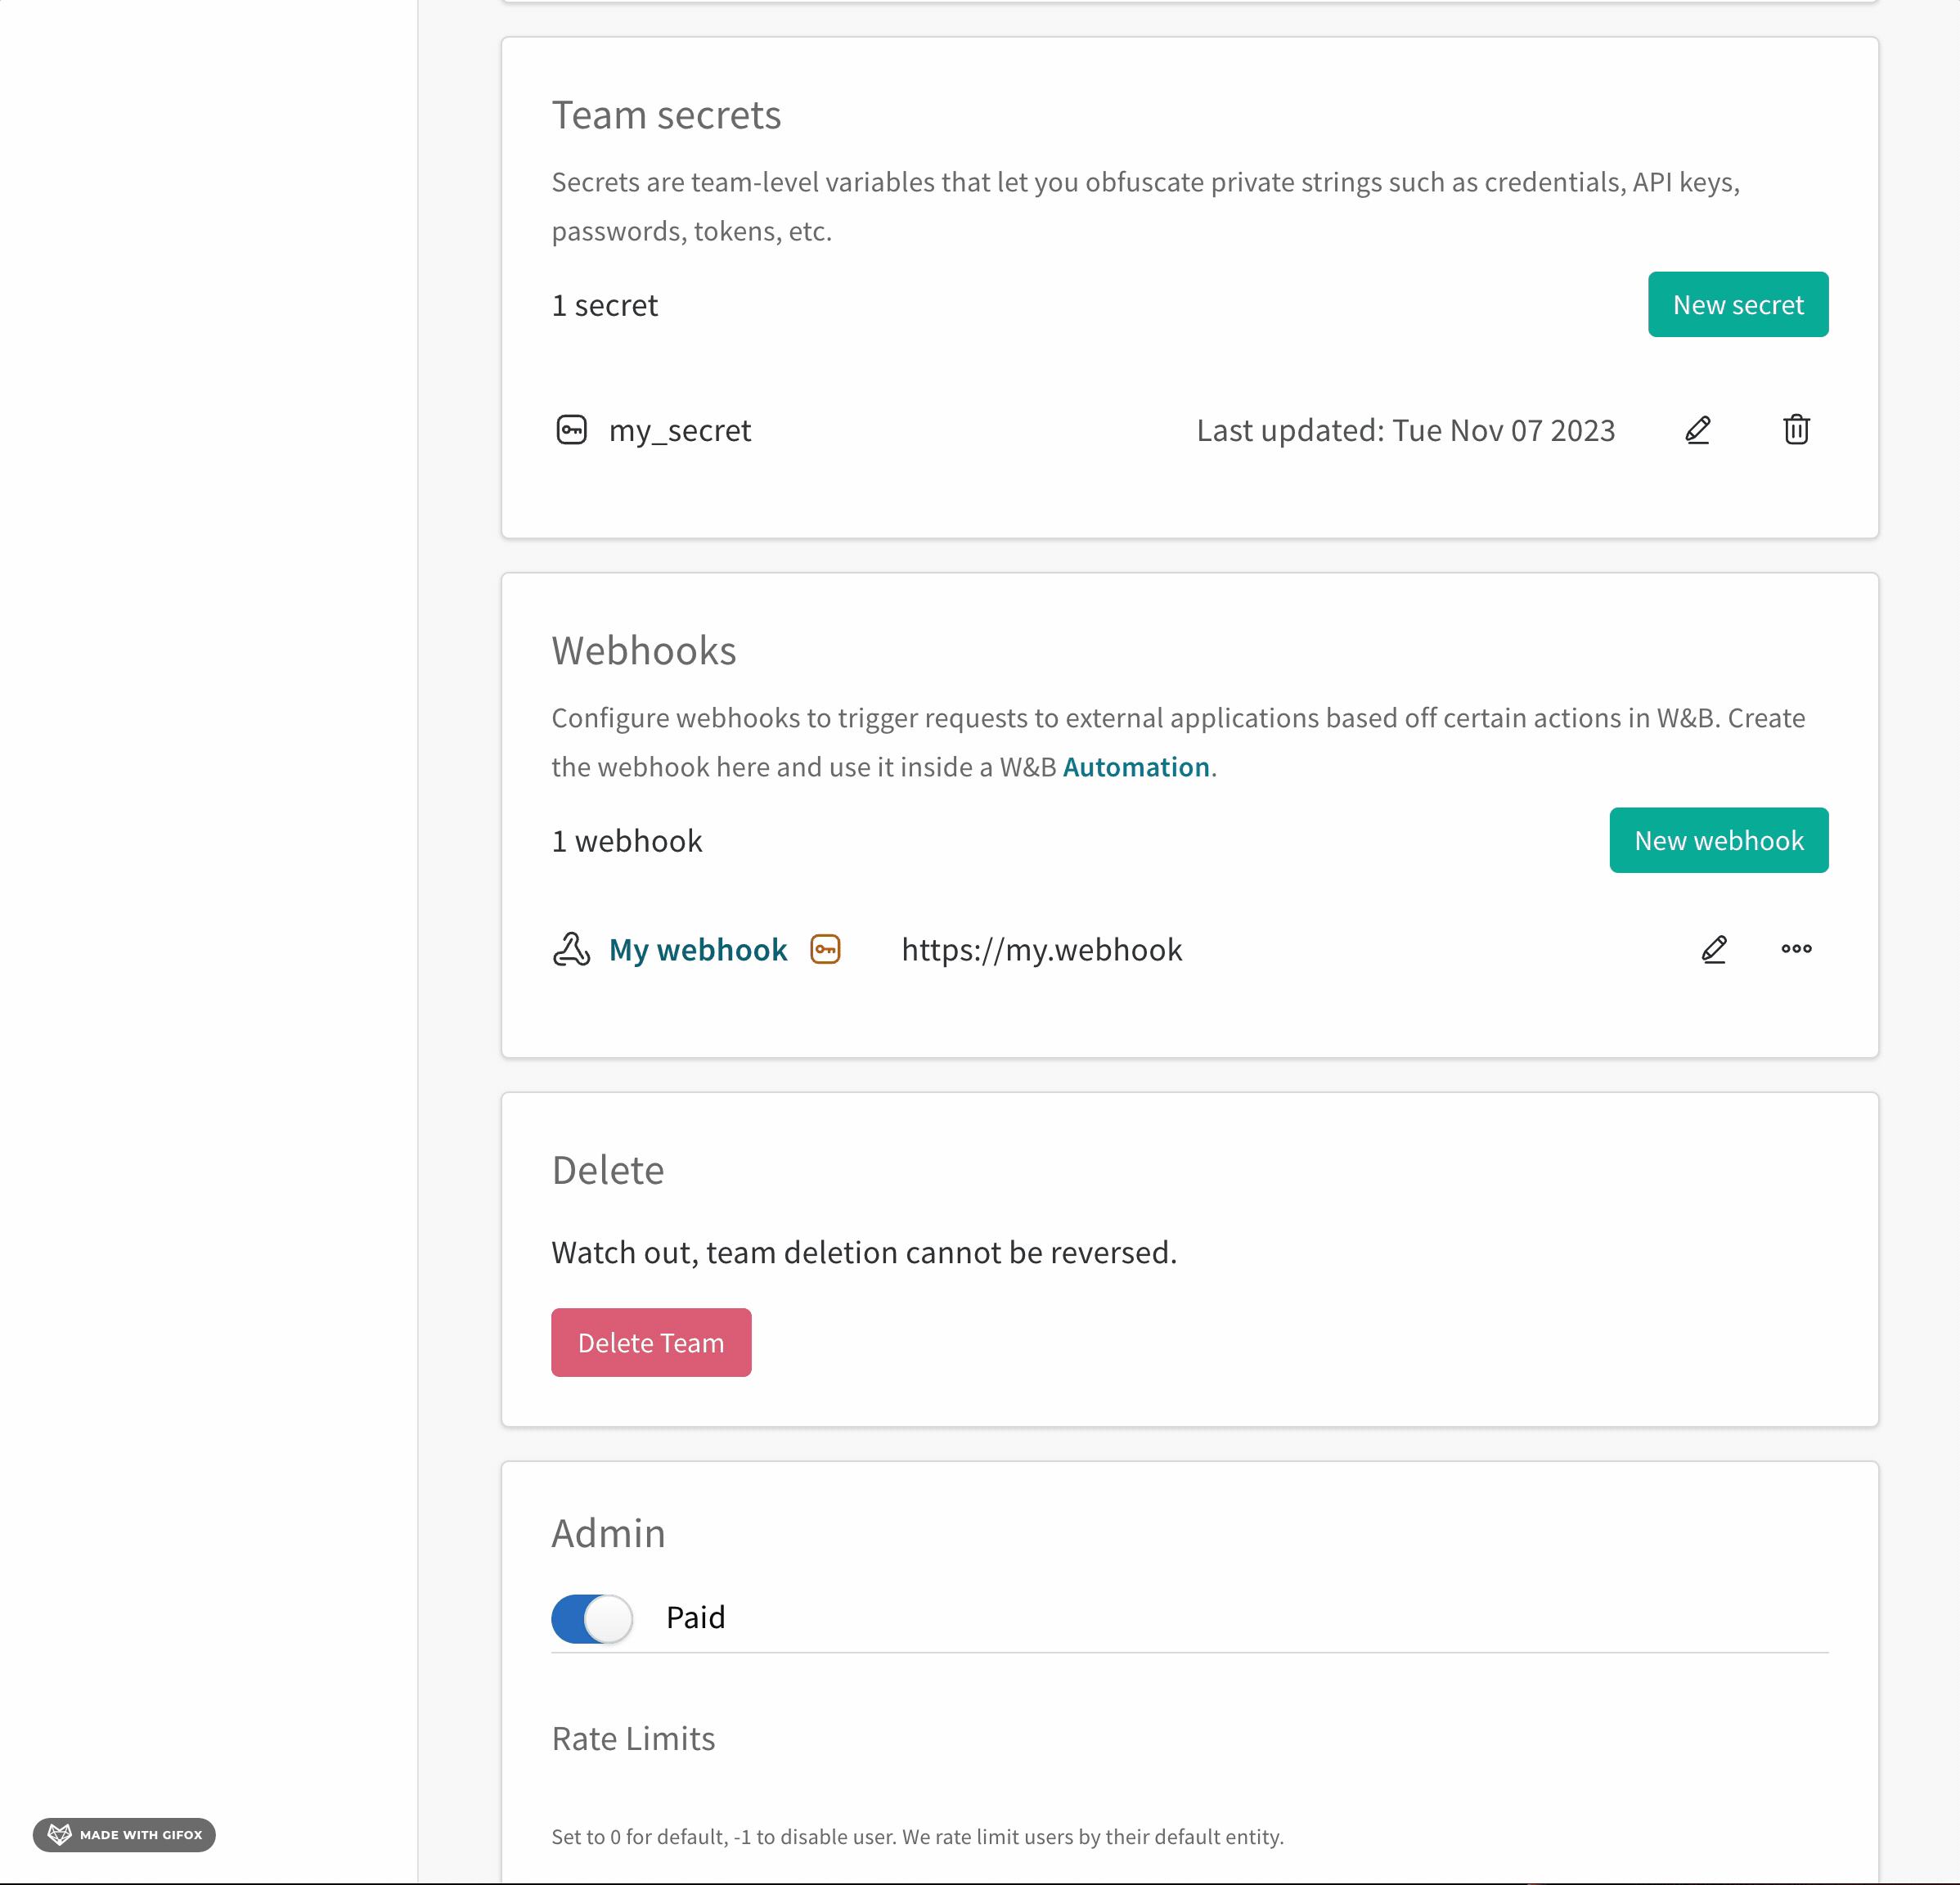
A team admin can add a webhook for the team.
If the webhook requires a Bearer token or its payload requires a sensitive string, create a secret that contains it before creating the webhook. You can configure at most one access token and one other secret for a webhook. Your webhook’s authentication and authorization requirements are determined by the webhook’s service.
Log in to W&B and go to Team Settings page.
In the Webhooks section, click New webhook.
Provide a name for the webhook.
Provide the endpoint URL for the webhook.
If the webhook requires a Bearer token, set Access token to the secret that contains it. When using the webhook automation, W&B sets the Authorization: Bearer HTTP header to the access token, and you can access the token in the ${ACCESS_TOKEN}payload variable. Learn more about the structure of the POST request W&B sends to the webhook service in Troubleshoot your webhook.
If the webhook requires a password or other sensitive string in its payload, set Secret to the secret that contains it. When you configure the automation that uses the webhook, you can access the secret as a payload variable by prefixing its name with $.
If the webhook’s access token is stored in a secret, you must also complete the next step to specify the secret as the access token.
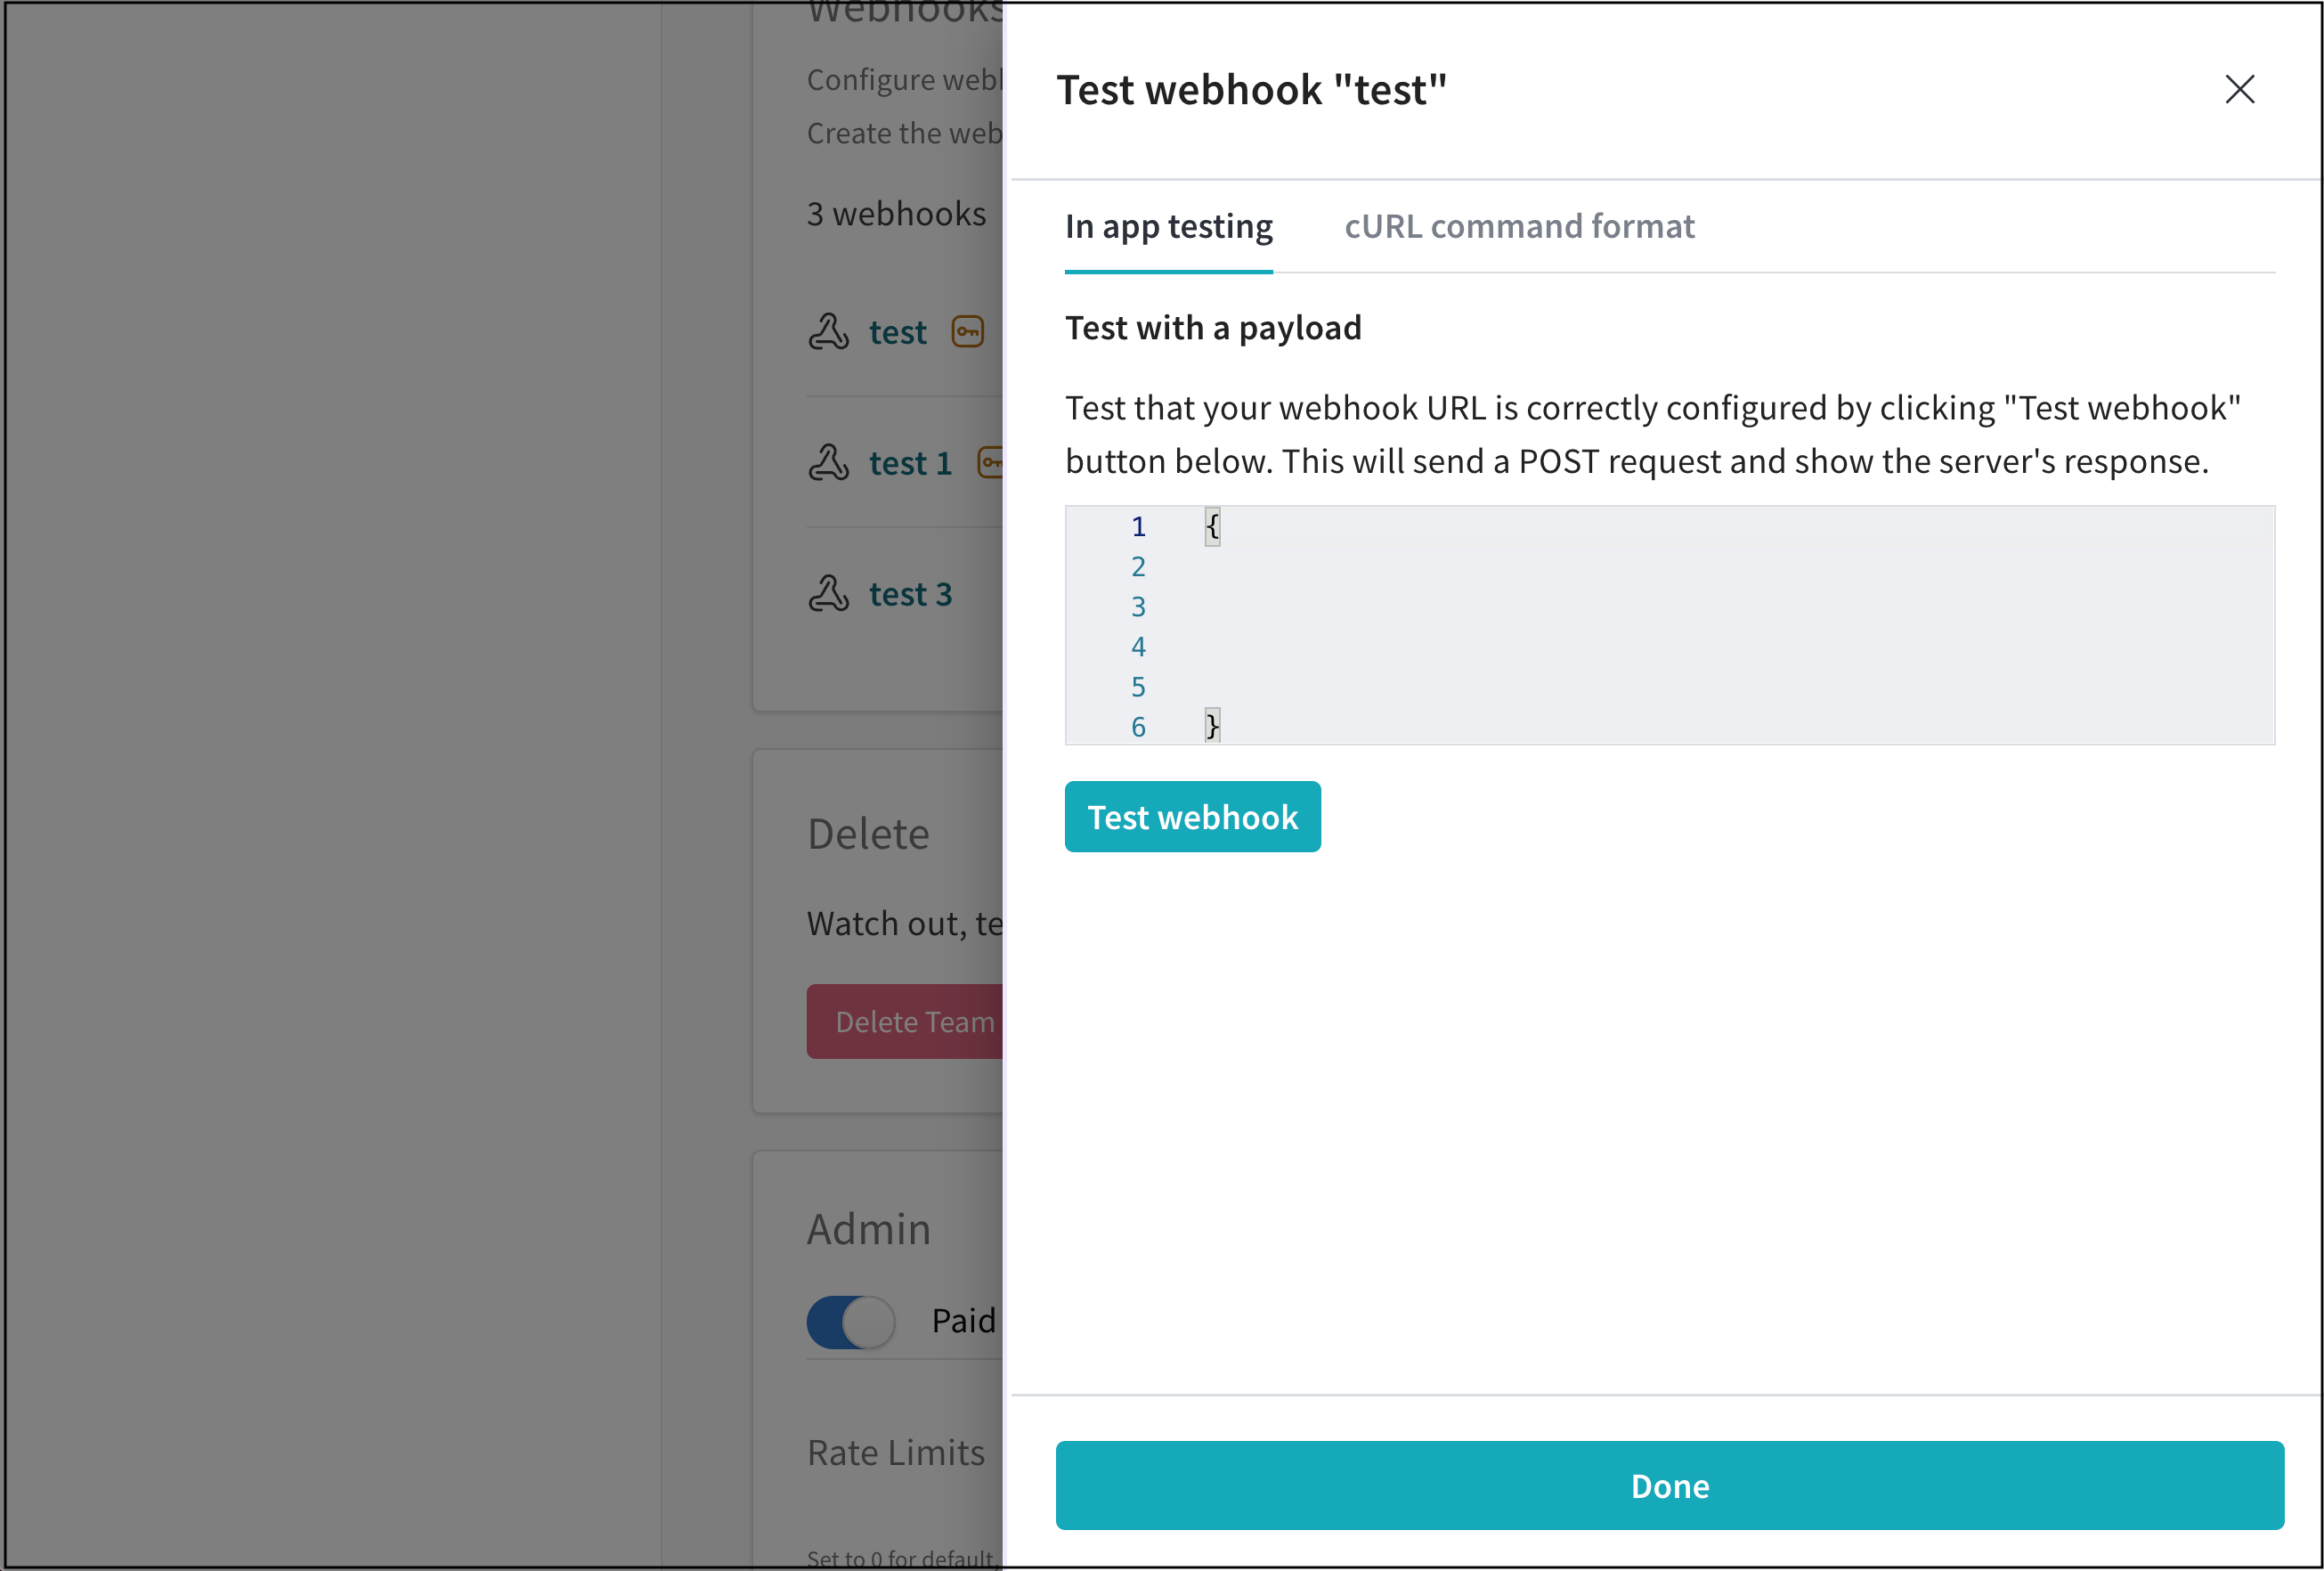
To verify that the W&B can connect and authenticate to the endpoint:
Optionally, provide a payload to test. To refer to a secret the webhook has access to in the payload, prefix its name with $. This payload is only used for testing and is not saved. You configure an automation’s payload when you create the automation. See Troubleshoot your webhook to view where the secret and access token are specified in the POST request.
Click Test. W&B attempts to connect to the webhook’s endpoint using the credentials you configured. If you provided a payload, W&B sends it.
If the test does not succeed, verify the webhook’s configuration and try again. If necessary, refer to Troubleshoot your webhook.
For programmatic automation creation: Webhooks must be configured through the UI for security reasons (secure storage of endpoints, tokens, and secrets). Once configured, you can use the API to create multiple automations that use the same webhook with different triggers and payloads. This separation ensures secure credential management while enabling flexible automation workflows via code.
Create an automation
After you configure a webhook, select Registry or Project, then follow these steps to create an automation that triggers the webhook.
A Registry admin can create automations in that registry. Registry automations are applied to all collections in the registry, including those added in the future.
Log in to W&B.
Click the name of a registry to view its details,
To create an automation scoped to the registry, click the Automations tab, then click Create automation. An automation that is scoped to a registry is automatically applied to all of its collections (including those created in the future).
To create an automation scoped only to a specific collection in the registry, click the collection’s action ... menu, then click Create automation. Alternatively, while viewing a collection, create an automation for it using the Create automation button in the Automations section of the collection’s details page.
Choose the event to watch for. Fill in any additional fields that appear, which depend upon the event. For example, if you select An artifact alias is added, you must specify the Alias regex. Click Next step.
Set Action type to Webhooks. then select the webhook to use.
If you configured an access token for the webhook, you can access the token in the ${ACCESS_TOKEN}payload variable. If you configured a secret for the webhook, you can access it in the payload by prefixing its name with $. Your webhook’s requirements are determined by the webhook’s service.
Click Next step.
Provide a name for the automation. Optionally, provide a description. Click Create automation.
A W&B admin can create automations in a project.
Log in to W&B and go to the project page.
In the sidebar, click Automations, then click Create automation.
Or, from a line plot in the workspace, you can quickly create a run metric automation for the metric it shows. Hover over the panel, then click the bell icon at the top of the panel.
Choose the event to watch for, such as when an artifact alias is added or when a run metric meets a given threshold.
Fill in any additional fields that appear, which depend upon the event. For example, if you select An artifact alias is added, you must specify the Alias regex.
Optionally specify a collection filter. Otherwise, the automation is applied to all collections in the project, including those added in the future.
Set Action type to Webhooks. then select the webhook to use.
If your webhook requires a payload, construct it and paste it into the Payload field. If you configured an access token for the webhook, you can access the token in the ${ACCESS_TOKEN}payload variable. If you configured a secret for the webhook, you can access it in the payload by prefixing its name with $. Your webhook’s requirements are determined by the webhook’s service.
Click Next step.
Provide a name for the automation. Optionally, provide a description. Click Create automation.
Create automations programmatically
You can also create webhook automations using the W&B API. This enables you to automate the creation and management of automations as part of your MLOps workflows.
Note: Webhooks and secrets must be created through the W&B UI for security reasons. The UI allows secure configuration of endpoints, authentication tokens, and secret management. Once configured, you can use the API to list available webhooks and create automations that use them.
Checking for Webhook Integrations
Before creating automations, verify that you have webhook integrations configured:
import wandb
# Initialize the APIapi = wandb.Api()
# List all webhook integrations for your teamwebhook_integrations = list(api.webhook_integrations(entity="your-team"))
ifnot webhook_integrations:
print("❌ No webhook integrations found!")
print("Please configure a webhook in your team settings:")
print(f"https://wandb.ai/{your-team}/settings/webhooks")
else:
print(f"✅ Found {len(webhook_integrations)} webhook integration(s):")
for webhook in webhook_integrations:
print(f" - Name: {webhook.name}")
print(f" URL: {webhook.url_endpoint}")
print(f" ID: {webhook.id}")
if hasattr(webhook, 'has_access_token') and webhook.has_access_token:
print(f" Auth: Has access token")
Helper Functions for Webhook Management
defget_webhook_integration(entity, name_pattern=None, url_pattern=None):
"""Get a webhook integration by name or URL pattern""" webhooks = list(api.webhook_integrations(entity=entity))
ifnot webhooks:
raiseValueError(f"No webhook integrations found for {entity}. ""Please configure one in team settings.")
# Filter by name patternif name_pattern:
matching = [w for w in webhooks if name_pattern in w.name]
if matching:
return matching[0]
# Filter by URL patternif url_pattern:
matching = [w for w in webhooks if url_pattern in w.url_endpoint]
if matching:
return matching[0]
# Return first webhook if no pattern or no matchesreturn webhooks[0]
deflist_webhook_requirements(webhook):
"""Display information about webhook configuration""" print(f"Webhook: {webhook.name}")
print(f" Endpoint: {webhook.url_endpoint}")
if hasattr(webhook, 'has_access_token') and webhook.has_access_token:
print(" ✓ Has access token configured")
print(" Use ${ACCESS_TOKEN} in payload to access it")
if hasattr(webhook, 'secrets') and webhook.secrets:
print(f" ✓ Has {len(webhook.secrets)} secret(s) configured")
for secret in webhook.secrets:
print(f" Use ${{{secret}}} in payload to access secret '{secret}'")
# Example usagetry:
# Get webhook for GitHub integration github_webhook = get_webhook_integration("my-team", url_pattern="github.com")
list_webhook_requirements(github_webhook)
exceptValueErroras e:
print(e)
Understanding Webhook Configuration
When creating webhook automations, it’s important to understand what was configured in the UI:
Endpoint URL: The URL where W&B will send POST requests
Access Token: Optional Bearer token for authentication (accessed via ${ACCESS_TOKEN})
Secrets: Additional secrets for the payload (accessed via ${SECRET_NAME})
Example of checking webhook capabilities:
# Check if webhook supports authenticationwebhook = get_webhook_integration("my-team", "deployment-webhook")
# Build payload based on webhook configurationpayload = {
"event": "model_ready",
"model": "${artifact_version_string}",
}
# Add authentication if configuredif hasattr(webhook, 'has_access_token') and webhook.has_access_token:
payload["auth"] ="${ACCESS_TOKEN}"# W&B will substitute the actual token# Create automation with appropriate payloadaction = SendWebhook.from_integration(webhook, payload=payload)
Example: Registry automation for model deployment
Create an automation that triggers a deployment webhook when a model is promoted to production:
import wandb
from wandb.automations import OnAddArtifactAlias, SendWebhook
# Initialize the W&B APIapi = wandb.Api()
# Get the registry and collectionregistry = api.registry("model-registry", entity="my-team")
collection = registry.collection("llm-models")
# Get the webhook integrationwebhook_integration = next(api.webhook_integrations(entity="my-team"))
# Define the event: Trigger when "production" alias is addedevent = OnAddArtifactAlias(
scope=collection,
filter={"alias": "production"}
)
# Define the webhook payload with template variablespayload = {
"event_type": "DEPLOY_MODEL",
"model_info": {
"artifact_version": "${artifact_version_string}",
"collection": "${artifact_collection_name}",
"entity": "${entity_name}",
"project": "${project_name}",
"author": "${event_author}",
"event_type": "${event_type}" },
"deployment_config": {
"environment": "production",
"auto_scale": True,
"min_replicas": 2 }
}
# Define the action: Send webhook with payloadaction = SendWebhook.from_integration(
webhook_integration,
payload=payload
)
# Create the automationautomation = api.create_automation(
event >> action,
name="production-deployment-trigger",
description="Trigger deployment pipeline when model is promoted to production")
print(f"Created automation: {automation.name}")
Example: Monitor artifact creation across registry
Create an automation that sends artifact metadata to an external tracking system:
import wandb
from wandb.automations import OnCreateArtifact, SendWebhook
# Initialize the W&B APIapi = wandb.Api()
# Get the registryregistry = api.registry("model-registry", entity="my-team")
# Get the webhook integrationwebhook_integration = next(
(w for w in api.webhook_integrations(entity="my-team")
if"tracking-system"in w.url_endpoint)
)
# Define event at registry scopeevent = OnCreateArtifact(
scope=registry,
filter={"artifact_type": "model"}
)
# Define payload with artifact metadatapayload = {
"action": "register_model",
"artifact": {
"id": "${artifact_version}",
"name": "${artifact_collection_name}",
"metadata": "${artifact_metadata.model_type}", # Access specific metadata key"created_by": "${event_author}" },
"source": "wandb_registry"}
# Define the actionaction = SendWebhook.from_integration(
webhook_integration,
payload=payload
)
# Create the automationautomation = api.create_automation(
event >> action,
name="external-tracking-sync",
description="Sync new models to external tracking system")
Example: Project automation for CI/CD integration
Create an automation that triggers a GitHub Actions workflow when metrics meet criteria:
import wandb
from wandb.automations import OnRunMetric, RunEvent, SendWebhook
# Initialize the W&B APIapi = wandb.Api()
# Get the projectproject = api.project("model-training", entity="my-team")
# Get the webhook integration (GitHub repository dispatch)github_webhook = next(
(w for w in api.webhook_integrations(entity="my-team")
if"api.github.com"in w.url_endpoint)
)
# Define the event: Trigger when model performance is goodevent = OnRunMetric(
scope=project,
filter=(RunEvent.metric("val_accuracy") >0.95) & (RunEvent.metric("val_loss") <0.05)
)
# Define GitHub repository dispatch payloadpayload = {
"event_type": "MODEL_READY_FOR_REVIEW",
"client_payload": {
"artifact_version": "${artifact_version_string}",
"collection": "${artifact_collection_name}",
"project": "${project_name}",
"metrics": {
"event_type": "${event_type}",
"author": "${event_author}" },
"author": "${event_author}",
"entity": "${entity_name}" }
}
# Define the actionaction = SendWebhook.from_integration(
github_webhook,
payload=payload
)
# Create the automationautomation = api.create_automation(
event >> action,
name="high-performance-model-review",
description="Trigger review workflow for high-performing models")
print(f"Created automation: {automation.name}")
Example: Experiment monitoring with custom endpoints
Create an automation that posts experiment results to a custom endpoint:
import wandb
from wandb.automations import OnRunMetric, RunEvent, SendWebhook
# Initialize the W&B APIapi = wandb.Api()
# Get the projectproject = api.project("research-experiments", entity="my-team")
# Get a specific webhook by name or URLwebhook_integration = next(
w for w in api.webhook_integrations(entity="my-team")
if w.name =="experiment-tracker")
# Define the event: Trigger when a run completes with good metricsevent = OnRunMetric(
scope=project,
filter=RunEvent.metric("final_loss") <0.1)
# Define custom payload with run summarypayload = {
"experiment": {
"event_type": "${event_type}",
"project": "${project_name}",
"entity": "${entity_name}",
"author": "${event_author}",
"artifact_version": "${artifact_version_string}" },
"notification": {
"type": "experiment_complete",
"priority": "normal",
"recipient": "${event_author}" }
}
# Define the actionaction = SendWebhook.from_integration(
webhook_integration,
payload=payload
)
# Create the automationautomation = api.create_automation(
event >> action,
name="experiment-completion-tracker",
description="Send notification when experiments achieve low loss")
Managing webhook automations via API
You can list, update, and manage webhook automations programmatically:
# List all automations for a project or registryautomations = project.automations() # or registry.automations()# Filter automations by typewebhook_automations = [
a for a in automations
if a.action.action_type =="GENERIC_WEBHOOK"]
# Update webhook payloadfor automation in webhook_automations:
if automation.name =="my-webhook-automation":
# Modify the automation configuration automation.action.request_payload = updated_payload
automation.save()
# Delete an automationautomation.delete()
Advanced webhook patterns
Using secrets in webhooks
Access secrets in your webhook payloads for secure authentication:
# Assuming you have a secret named "DEPLOY_TOKEN" configuredpayload = {
"auth_token": "${DEPLOY_TOKEN}", # Secret accessed with $ prefix"deployment": {
"model": "${artifact_version_string}",
"environment": "production" }
}
Conditional webhook routing
Route webhooks to different endpoints based on conditions:
# Get multiple webhook integrationsstaging_webhook = next(
w for w in api.webhook_integrations(entity="my-team")
if"staging"in w.name
)
production_webhook = next(
w for w in api.webhook_integrations(entity="my-team")
if"production"in w.name
)
# Create different automations for different conditions# Staging automation for experimentsstaging_event = OnRunMetric(
scope=project,
filter=RunEvent.metric("val_accuracy") >0.90)
staging_automation = api.create_automation(
staging_event >> SendWebhook.from_integration(staging_webhook),
name="staging-deployment")
# Production automation for higher thresholdprod_event = OnRunMetric(
scope=project,
filter=RunEvent.metric("val_accuracy") >0.95)
prod_automation = api.create_automation(
prod_event >> SendWebhook.from_integration(production_webhook),
name="production-deployment")
Manage a registry’s automations from the registry’s Automations tab.
Manage a collection’s automations from the Automations section of the collection’s details page.
From either of these pages, a Registry admin can manage existing automations:
To view an automation’s details, click its name.
To edit an automation, click its action ... menu, then click Edit automation.
To delete an automation, click its action ... menu, then click Delete automation. Confirmation is required.
A W&B admin can view and manage a project’s automations from the project’s Automations tab.
To view an automation’s details, click its name.
To edit an automation, click its action ... menu, then click Edit automation.
To delete an automation, click its action ... menu, then click Delete automation. Confirmation is required.
Payload reference
Use these sections to construct your webhoook’s payload. For details about testing your webhook and its payload, refer to Troubleshoot your webhook.
Payload variables
This section describes the variables you can use to construct your webhook’s payload.
Variable
Details
${project_name}
The name of the project that owns the mutation that triggered the action.
${entity_name}
The name of the entity or team that owns the mutation that triggered the action.
${event_type}
The type of event that triggered the action.
${event_author}
The user that triggered the action.
${alias}
Contains an artifact’s alias if the automation is triggered by the An artifact alias is added event. For other automations, this variable is blank.
${tag}
Contains an artifact’s tags if the automation is triggered by the An artifact tag is added event. For other automations, this variable is blank.
${artifact_collection_name}
The name of the artifact collection that the artifact version is linked to.
${artifact_metadata.<KEY>}
The value of an arbitrary top-level metadata key from the artifact version that triggered the action. Replace <KEY> with the name of a top-level metadata key. Only top-level metadata keys are available in the webhook’s payload.
${artifact_version}
The Wandb.Artifact representation of the artifact version that triggered the action.
${artifact_version_string}
The string representation of the artifact version that triggered the action.
${ACCESS_TOKEN}
The value of the access token configured in the webhook, if an access token is configured. The access token is automatically passed in the Authorization: Bearer HTTP header.
${SECRET_NAME}
If configured, the value of a secret configured in the webhook. Replace SECRET_NAME with the name of the secret.
Payload examples
This section includes examples of webhook payloads for some common use cases. The examples demonstrate how to use payload variables.
Verify that your access tokens have required set of permissions to trigger your GHA workflow. For more information, see these GitHub Docs.
Send a repository dispatch from W&B to trigger a GitHub action. For example, suppose you have a GitHub workflow file that accepts a repository dispatch as a trigger for the on key:
on:
repository_dispatch:
  types: BUILD_AND_DEPLOY
The payload for the repository might look something like:
The event_type key in the webhook payload must match the types field in the GitHub workflow YAML file.
The contents and positioning of rendered template strings depends on the event or model version the automation is configured for. ${event_type} will render as either LINK_ARTIFACT or ADD_ARTIFACT_ALIAS. See below for an example mapping:
Use template strings to dynamically pass context from W&B to GitHub Actions and other tools. If those tools can call Python scripts, they can consume the registered model artifacts through the W&B API.
Review a W&B report, which illustrates how to use a Github Actions webhook automation for Model CI. Check out this GitHub repository to learn how to create model CI with a Modal Labs webhook.
This example payload shows how to notify your Teams channel using a webhook:
{
"@type": "MessageCard",
"@context": "http://schema.org/extensions",
"summary": "New Notification",
"sections": [
  {
    "activityTitle": "Notification from WANDB",
    "text": "This is an example message sent via Teams webhook.",
    "facts": [
      {
        "name": "Author",
        "value": "${event_author}"
      },
      {
        "name": "Event Type",
        "value": "${event_type}"
      }
    ],
    "markdown": true
  }
]
}
You can use template strings to inject W&B data into your payload at the time of execution (as shown in the Teams example above).
This section is provided for historical purposes. If you currently use a webhook to integrate with Slack, W&B recommends that you update your configuration to use the [new Slack integration]({{ relref “#create-a-slack-automation”}}) instead.
Set up your Slack app and add an incoming webhook integration with the instructions highlighted in the Slack API documentation. Ensure that you have the secret specified under Bot User OAuth Token as your W&B webhook’s access token.
Interactively troubleshoot your webhook with the W&B App UI or programmatically with a Bash script. You can troubleshoot a webhook when you create a new webhook or edit an existing webhook.
For details about the format W&B uses for the POST request, refer to the Bash script tab.
A team admin can test a webhook interactively with the W&B App UI.
Navigate to your W&B Team Settings page.
Scroll to the Webhooks section.
Click on the horizontal three docs (meatball icon) next to the name of your webhook.
Select Test.
From the UI panel that appears, paste your POST request to the field that appears.
Click on Test webhook. Within the W&B App UI, W&B posts the response from your endpoint.